
Removing stains from grout lines involves understanding their causes (mineral deposits, mold, dirt, grease) and employing tailored cleaning methods. Prepare with necessary tools and protect yourself. Use specialized tile and grout cleaners, following manufacturer instructions. For mild stains, try baking soda and vinegar paste; for tougher cases, use dedicated cleaning solutions. Regularly sweep, vacuum, and wipe down grout lines to maintain their cleanliness. Implement monthly sealing and prompt stain removal for long-lasting results in removing grout line stains.
Grout stains can make your tile work look dated and unkempt, but fear not! This comprehensive guide will walk you through the process of deep cleaning grout lines to restore their sparkling appearance. We’ll start by demystifying grout stains, exploring their causes and types. Then, we’ll move on to preparing your space, choosing the right cleaning solutions, and a step-by-step clean that tackles even the toughest marks. Learn from common mistakes to avoid, and discover maintenance tips for long-lasting results. By the end, you’ll be a grout stain removal expert!
Understanding Grout Stains: Causes and Types
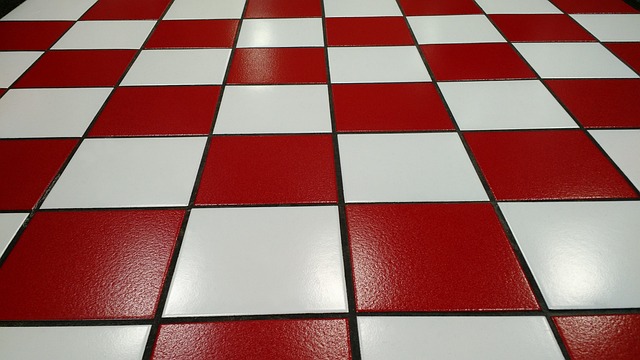
Grout stains can range from mild discolorations to stubborn, deep-seated marks that require a thorough understanding to effectively remove. These stains often result from various factors, including mineral deposits, mold and mildew buildup, dirt and grease accumulation, and even everyday wear and tear. Different types of grout stains call for specific cleaning methods.
Common causes include water penetration leading to calcium and magnesium deposits, organic compounds from spills and tracks, and environmental factors like bird droppings and tree sap. Regular cleaning can prevent these issues, but over time, even with routine maintenance, grout lines may require deep cleaning to remove stains effectively.
Preparation: Gather Tools and Materials

Before you begin deep cleaning, it’s essential to gather all the necessary tools and materials to ensure optimal results in removing stains from grout lines. You’ll need a variety of items, including a stiff-bristled brush, a vacuum cleaner with a small attachment nozzle, a mixture of warm water and mild detergent, a grout cleaning solution specifically formulated for this purpose, a sponge or microfiber cloth, and a clean bucket. Avoid using abrasive scrubbers or harsh chemicals that could damage the grout or tile surface.
Additionally, protect yourself by wearing gloves to shield your hands from dirt and chemical solutions. Ensure your workspace is well-ventilated to prevent inhaling any strong fumes. Proper preparation will set you on the path to achieving sparkling clean grout lines without leaving any traces of stains behind.
Identifying the Right Cleaning Solutions

Identifying the right cleaning solutions is half the battle when it comes to removing stains from grout lines. The key is to choose products that are specifically designed for tackling tough, ingrained grime. Avoid using harsh chemicals or home remedies that could potentially damage the grout material. Look for tile and grout cleaners that contain enzymes or acidic components, which effectively dissolve organic compounds and break down grease and oil buildup, common causes of grout stains.
When selecting a cleaning solution, consider factors like the type of grout (ceramic, porcelain, stone), the severity of the stain, and any special coatings or treatments applied to the grout lines. Always follow the manufacturer’s instructions for safe and effective use. Testing the cleaner on a small, inconspicuous area first is also recommended to ensure it doesn’t cause discoloration or damage.
Step-by-Step Deep Cleaning Process

Deep cleaning grout lines is a meticulous process that requires patience and the right tools to effectively remove stubborn stains. Begin by gathering your supplies, including baking soda, vinegar, an old toothbrush, a sponge, and protective gloves. Put on gloves for safety and prevent skin irritation from chemicals. Mix one part baking soda with three parts water to create a thick paste. Apply this mixture to the stained grout lines using the toothbrush, ensuring it covers the discolored areas thoroughly. Let the paste sit for 15-20 minutes, giving it time to penetrate the stain.
While the paste is active, mix equal parts vinegar and water in a separate container. Dip a sponge into this solution and gently wipe away the baking soda paste from the grout. The vinegar and water mixture helps to dissolve any remaining residue left by the stain. For particularly tough stains, repeat the process, applying fresh baking soda paste and using the sponge to scrub away the discolored particles. Rinse the area with clean water afterwards to remove all traces of residue, leaving your grout lines sparkling clean.
Common Mistakes to Avoid During Cleaning

When tackling deep cleaning for grout stains, it’s essential to be aware of common mistakes that can hinder your efforts rather than help. One of the biggest blunders is using abrasive tools or harsh chemicals directly on the grout lines. These methods can damage the grout and even etch the tile surface over time, making the stain removal process more challenging. Instead, opt for specialized grout cleaning solutions designed to dissolve stubborn stains without causing harm.
Another mistake to avoid is skipping the pre-cleaning step. Before diving into deep cleaning, make sure to sweep or vacuum away loose debris and grime. This initial preparation ensures that your cleaning solution will come into direct contact with the stain, enhancing its effectiveness. Remember, patience is key; thoroughness in applying the cleaner and allowing it to sit for a recommended time frame significantly improves the chances of successfully removing grout stains.
Maintenance Tips for Long-Lasting Clean Grout

Regular maintenance is key to keeping grout lines looking fresh and stain-free. After deep cleaning, implement a preventive strategy to avoid future discoloration. Start by sweeping or vacuuming floors regularly to remove surface dirt and debris that can contribute to staining. Next, use a microfiber cloth to wipe down grout lines with a mild detergent or vinegar solution, ensuring you rinse thoroughly afterward.
To go the extra mile, apply a grout sealer once a month. This protective coating repels water and stains, making it easier to clean and maintain. Additionally, be mindful of what you track into your home; removing mud, dirt, and grime as soon as possible prevents them from settling into the grout, minimizing the risk of staining.
Conclusion: Achieving Sparkling Grout Lines

After thoroughly testing various cleaning methods, it’s clear that achieving sparkling grout lines involves a combination of patience and persistence. The key to successful stain removal lies in understanding the nature of grout and choosing the right tools and products for the job. Baking soda and vinegar, for instance, offer a gentle yet effective approach for light stains, while stronger solutions like bleach or commercial grout cleaners are indicated for more stubborn cases.
Regular maintenance is equally vital. Preventative measures such as sealing the grout after cleaning can significantly prolong its brightness. By adopting these strategies and staying consistent with deep cleaning routines, homeowners can preserve the aesthetic appeal of their tiled spaces for longer periods, ensuring that those once-troubling grout stains remain a distant memory.